Screen printing involves the practice of pushing ink through a meshed screen stencil in order to superimpose a print on a substrate. At Linepro, more than 90% of graphic overlays for membrane keypads, switches and keyboards are printed by means of screen printing. This is a very popular method used across a variety of industries, the most common example being – graphics printed t-shirts which we wear in our day to day lives. It’s sometimes referred to as the silk printing or serigraphy however all names are referring to the same fundamental technique of screen printing itself.
Screen printing is a powerful method to create striking posters, canvases and art work, however the technique can be employed to print textiles and fabric which is why it’s ideal for making all kinds of personalized clothing and items. Furthermore, this type of printing method is used in industrial sectors too. We at Linepro make graphic overlays by screen printing and the substrate or media of print is polycarbonate or polyester. In this article we’ll address all your concerns about screen printing, which includes:
- What is Screen Printing?
- Which screen printing technique is preferred the most over other printing methods?
- Screen printing: Step-by-Step
What is screen printing?
Screen printing refers to the act of transferring a stenciled image on a flat substrate with an ink-filled mesh screen and the squeegee. Paper and fabrics are the most frequently screen-printed materials, but using special inks, it is also possible to print on metal, wood, plastic as well as glass. The fundamental method is to create an image on the fine mesh screen and then pressing ink through the screen to make the impression of your image on the substrate beneath.
There are various techniques for stenciling, including:
- Use masking tape or vinyl to cover the desired areas on the screen.
- The stencil can be painted onto the mesh using screen blockers like lacquer or glue.
This method of printing may employ only one color of ink or even a few. For multi-colored objects, the colors must be applied individually by using separate stencils for each color.
Which screen printing technique is preferred the most over other printing methods?
One of the main reasons the technique of screen printing is so popular is due to the fact that it creates vivid colors even on opaque substrates. The ink or paint is layered on the substrate’s surface which gives the printed image a pleasant 3 dimensional or tactile appearance.
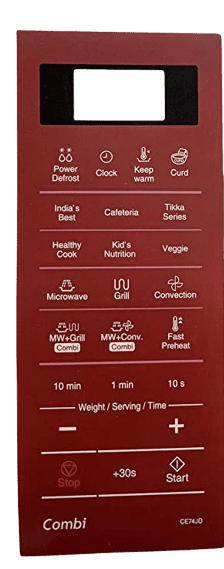
The method is also popular due to its ability to reproduce an image repeatedly. Because the same stencil could be used to duplicate an image over and over, this technique is extremely useful in making multiple duplicates of the same item. Screen printing is an efficient method of producing large quantities of customized graphical items just like Linepro’s Graphic Overlays for Membrane Keypad.
When printed with expert equipment and an experienced printing operator, we can also create intricate multi-colored designs. Although the complex nature of the process can make it difficult to limit the colors the printing operator can print, however, it allows for more intense color use that is not possible using digital printing on its own.
Screen printing: Step-by-Step
There are a variety of methods for screen printing; however they all share the same basic process. The method that we’ll discuss below employs an emulsion that is light-responsive to create a customized stencil. It is thought to be the most well-known method of commercial printing since it allows creating intricate stencils.
We’ll walk you through the process of screen printing step-by-step. We’ve also created video footage of the process happening in our facility to show you the process we use to create our high-end custom-designed screen-printed graphic overlays.
Step 1: Creating the design
The printing operator first takes the image they would like to incorporate into the finished product and prints it on an acetate film with a transparent surface. This is used to make the stencil.
Step 2: Screen Preparation
The printing operator chooses an appropriate mesh screen that matches the intricate nature of the design as well as the texture of the substrate to be printed. The mesh screen is coated with a layer of light-reactive emulsion. This will harden when exposed to intense UV light.
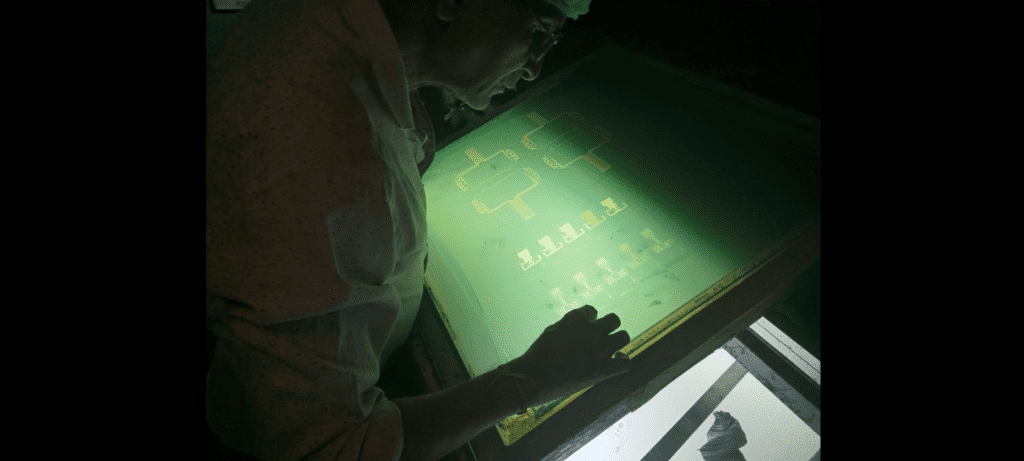
Step 3: The emulsion will be exposed
The acetate sheet with the design is then placed on the emulsion-coated screen and then the entire thing is exposed to extremely intense UV light. The light’s heat is able to make the emulsion harder, and those parts of the screen coated by the design stay with a liquid-like form.
If the final design would have more than one color, the screen should be utilized to put on each ink layers. For multi-colored products, the printing operator should employ his creativity to design each stencil and align them precisely to ensure the appearance is flawless.
Step 4: The emulsion is removed by washing it off forming the stencil
After the screen is exposed for a certain amount of duration, the portions of the screen that are not being covered turn hard. Any emulsion that has not been hardened is thoroughly rinsed away. This creates a clear imprint of the design on the screen that allows the ink to move through.
The screen will then dry and the printing operator makes any adjustments or touch-ups that are required to ensure that the print is as close as it can be to the original layout. It is then ready to use.
Phase 5: Screen is ready to be used for printing impressions
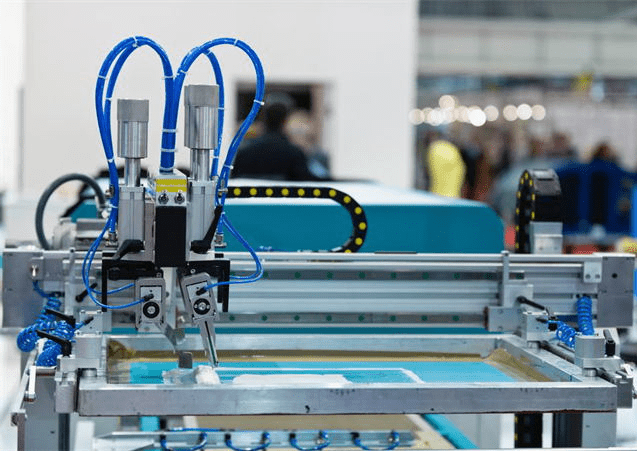
The screen is mounted on the printing machine bed. The substrate on which print impressions are done is laid flat on the printing board and placed beneath the screen.
There are many different types of presses which include manual and automatic mode of functioning. However, the majority of modern commercial printers utilize an automatic roll-to-roll printer. If you want to print multiple colors this type of screen printing could also be employed to apply distinct color layers in rapid intervals.
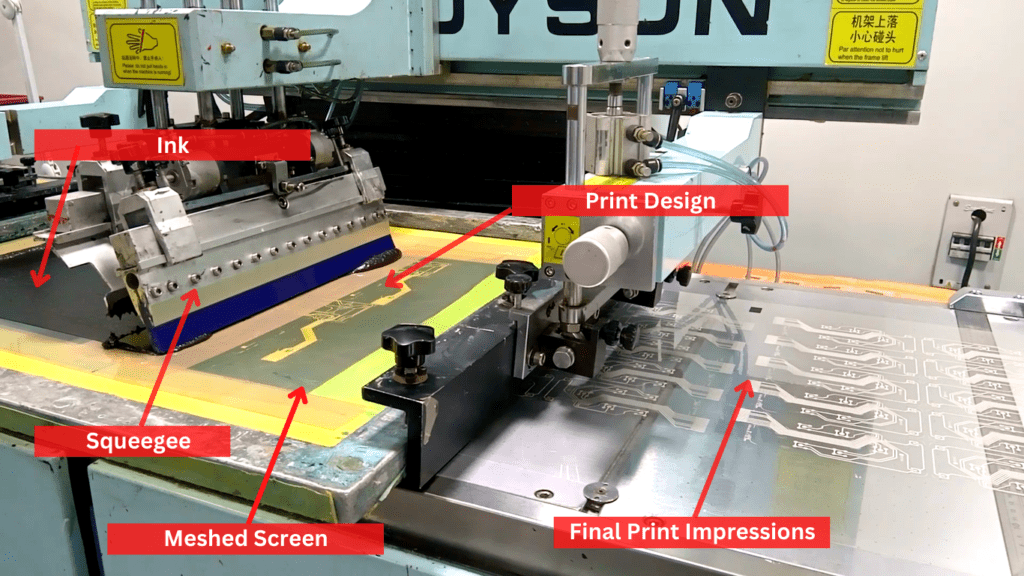
Step 6: The ink is forced through the screen onto the object
The screen is lowered on the print board. Ink is poured onto the top of the screen. Using a squeegee, the ink is moved along all the long length. The ink is pushed through the exposed areas of the stencil, and imprints the design on the surface beneath.
After all items are printed and the stencil has fulfilled its function then the emulsion must be removed with a special wash fluid, allowing the mesh to be used again to make new stencils.
7. Drying the product, tested and then finished
The product is then passed through a drying device which cures the ink, resulting in an even, smooth finish. The finished product is examined and thoroughly cleaned to get rid of any residue before being given to the next owner.
Linepro has vast experience in screen printing , the main focus being Printed Electronics and Graphic Overlays. Our design team along with skilled printing operators make it possible to create eye catchy graphics and most accurate printed electronics products. Over period of 30 years, linepro has served every industry using our printed flexible circuits. We are always ready to assist you, please feel free to share your project ideas, and we promise you with a suitable solution.